A wardrobe can look correctly sized on a drawing and still fail to fit after flooring, skirting, plaster and false-ceiling work are complete. By checking the finished site, usable storage depth, board specification, hardware, moisture protection and installation quality, you can compare quotations and approve customised furniture with fewer surprises.
Key takeaways
- Measure after plaster, flooring, skirting and false-ceiling work is complete.
- Check usable wardrobe depth after doors, backs and internal fittings are included.
- Name the board, edge treatment, finish and hardware in the quotation.
- Inspect alignment, clearances, edges and doors before accepting installation.
Measure the Finished Room, Not the Bare Wall
Record the room only after plaster, flooring, skirting and false-ceiling work is complete. A wooden wardrobe measured against a bare wall can become too tall, lose wall contact or clash with finished flooring.
For customised furniture in Thane, inspect seepage and damp floor edges too; ask how the cabinet will be isolated, and do not place unprotected board against a leaking wall.
- Measure finished floor-to-ceiling height at the left, centre and right; use the smallest figure.
- Measure wall width at floor, mid-height and ceiling level; record the narrowest width.
- Record skirting-board height and projection from the wall, including any uneven sections.
- Mark every beam, column, pipe chase and wall projection with its width, depth and height.
- Locate doors and windows, then measure their frames, opening direction and clearance from the proposed wardrobe.
- Mark switchboards, sockets, internet points, light switches and concealed wiring routes.
- Record air-conditioner indoor units, ducts, drain pipes and service-access zones.
- Measure curtain tracks, curtain pockets and the clearance needed for the bedroom door, bed and nearby furniture.
| Site condition | Measurement to compare | Ordering risk |
|---|---|---|
| Finished ceiling | Lowest height versus wardrobe height | The cabinet cannot stand upright or hits the false ceiling |
| Uneven wall | Narrowest width versus widest width | Fillers, scribing or a revised width becomes necessary |
| Skirting present | Skirting depth versus cabinet setback | The wardrobe sits forward or leaves an unwanted gap |
| Damp wall or floor | Moisture source and isolation detail | Board swells even when its surface finish is labelled water-resistant |
Calculate Usable Depth and Door Clearance
Allow 550–600 mm of usable internal depth for clothes on hangers. A wooden wardrobe with less space can make shirts and jackets rub against the shutters, while folded clothes can fit in a shallower cabinet. Luggage needs extra depth and shelf height, so size that compartment separately.
Check the depth in layers:
- Usable internal depth: the clear space from the back panel to the front obstruction.
- Carcass depth: the cabinet box before shutters and external fittings.
- Overall depth: the carcass plus back clearance, shutters, handles, hinges or sliding-door tracks.
A quoted “600 mm depth” is not automatically 600 mm of storage.
| Door type | Storage and clearance effect | Check before approval |
|---|---|---|
| Hinged doors | Provide full opening access but need swing space in front | Confirm that the door will not hit the bed, study table, switchboard or bedroom door |
| Sliding doors | Save swing space and keep walkways clearer, but tracks and overlaps reduce access to the interior | Confirm level tracks, adequate door overlap and access for cleaning and roller replacement |
Mark the wardrobe’s full depth and each door’s movement on the bedroom floor before ordering. Keep drawer fronts and open shutters clear of the bed and walking route.
Measure the narrowest available passage, not only the distance beside the wardrobe, and check that a fully opened door still leaves a usable route to the room entrance.
Specify Boards, Edges and Finishes by Name
A quotation that says “wooden wardrobe in plywood” is incomplete. For customised furniture, name the board, thickness, grade, edge treatment and surface finish for every component.
| Component | State in the quotation | Moisture and finish protection |
|---|---|---|
| Carcass sides, top and bottom | 16 or 18 mm plywood, blockboard, MDF or particleboard; include the manufacturer and MR, BWR or BWP grade | Seal all exposed cut edges; do not describe MR MDF or particleboard as waterproof |
| Shelves and drawer boxes | Board type and thickness, such as 18 mm plywood for fixed shelves and the specified material for drawer parts | Seal shelf edges and drawer-box joints; state the laminate or paint finish |
| Shutters | 18 mm plywood, MDF or another named board, plus hinge or sliding-door construction | Specify laminate, veneer, acrylic or PU paint; seal every routed, drilled and cut edge |
| Back panel | 3–6 mm plywood or another named thickness, and whether it sits in a groove or is surface-fixed | Seal its perimeter and keep it clear of damp walls; it is not a substitute for structural side panels |
| Visible edges | ABS or PVC edge banding, with nominal thickness and machine-applied or manually glued application | Require continuous bonding at corners, because lifting edges admit moisture |
State the laminate or veneer brand, colour code, sheen and repair method. Also record the plywood warranty separately; a grade name alone does not confirm core quality. For a tall unit, include wall fixing or another anti-tip arrangement in the specification, not as an installation surprise.
Turn the Drawing and Quotation into a Measurable Specification
Do not approve a wardrobe drawing until every important dimension, material and cost appears in writing. Your wardrobe designer or wardrobe supplier in Thane should convert the sketch into a specification that another contractor could price and build without guessing.
1. Record the finished wall width and floor-to-ceiling height at several points after flooring, skirting and false-ceiling work. Use the smallest measurement, and note beams, columns, plumb errors, windows, doors, curtain tracks, electrical points and AC ducts.
2. Dimension the internal layout, not only the front elevation. Confirm the clear hanging height for long garments, shelf widths, drawer opening clearance, adjustable shelf-pin positions and a safe method for reaching loft compartments.
3. Name every board by component: plywood, blockboard, MDF or particleboard. State the thickness, laminate or paint finish, edge treatment and backing material; “moisture-resistant” MDF or particleboard is not waterproof, so do not place unprotected board against a seeping wall or damp floor.
4. Make the quotation separate carcass, shutters, hinges, drawer runners, sliding tracks, handles, transport, installation, wall fixing, dismantling, skirting removal, fillers, loft work, GST and electrical or civil modifications. Missing exclusions create disputes after the order.
5. Require hardware brand or performance specification, door weight limit, adjustment method and replacement availability. A phrase such as “branded hardware” is not measurable.
Grace Modular Kitchen & Interior can be assessed on the same basis: ask for this itemised drawing and quotation before treating its customised furniture proposal as comparable.
Related product
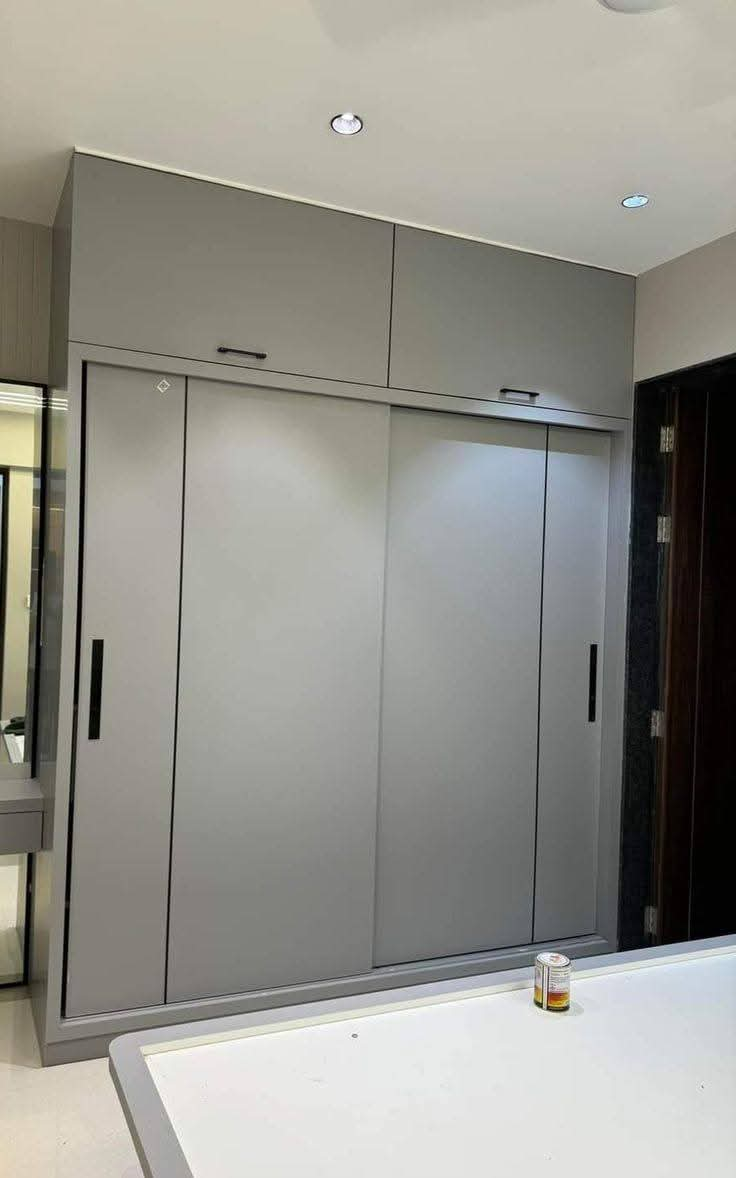 | Wardrobe Wardrobe ₹85000 Grace Interior, a respected interior design and renovation company in Thane, has built a strong reputation for offering high-quality wardrobe... |
Inspect the Installation Before You Accept It
Accept the installation only after testing the wooden wardrobe, not merely inspecting its laminate or veneer. Check the wall and floor for seepage, damp patches and recent water marks; a water-resistant board or finish cannot correct a leaking wall.
1. Place a spirit level against the sides, top and front. Uneven gaps, a leaning carcass or doors that swing open indicate an out-of-plumb installation or an unsuitable floor.
2. Push the tall cabinet gently at its upper edge. It must not rock. Confirm that the installer has fixed it to a suitable wall or fitted another anti-tip restraint, especially before opening several drawers together.
3. Open every shutter, drawer and sliding panel fully. Look for rubbing, scraping, uneven reveals, loose handles, stiff runners and doors that fail to stay aligned. Test the locks and soft-close mechanisms repeatedly.
4. Check each compartment against the approved drawing. Hang a long garment, pull drawers out with the bed or wall nearby, adjust shelves through their pin holes and confirm that loft storage has a safe access method.
5. Inspect the base for a plinth, legs or another separation from a damp floor. Do not accept exposed board pressed against a wall with known seepage.
Compare the finished work with the written order from your wardrobe supplier in Thane, including hardware, fillers, skirting removal, wall fixing and site modifications. Photograph defects, record them in a snag list and obtain a completion date before signing acceptance.
Frequently asked questions
When should you measure a room for a wooden wardrobe?
Measure after plaster, flooring, skirting and false-ceiling work is complete. Record the finished floor-to-ceiling height and the wall width at several points.
How do you calculate usable wardrobe depth and door clearance?
Separate the overall cabinet depth from the space left for clothes after the back panel, doors and internal fittings. Check that doors open without hitting nearby walls, beds or furniture.
What details should a customised furniture quotation name?
Ask the wardrobe designer to identify the board material, thickness, edge treatment, surface finish, hardware, internal layout, dimensions and installation scope.
What should you inspect before accepting wardrobe installation?
Check that the wardrobe is level, securely fixed, aligned with the finished wall and clear of the floor and ceiling. Open every door and drawer to test movement, gaps, handles and hardware.
Keywords